**** BREAKING NEWS ****
Firstly all know the new ProMarkers are coming out week commencing 14th September, well the DT have been very fortunate to get some ahead of launch and will be doing a Prize blog hop on Sunday 13th at 10am to celebrate the launch, there is a fabulous prize so please pop along and join in. All the details will be on Sunday, but here is just a tease of what you could win……sorry you didn’t think it was going to be that easy did you :)
******************
Also we have some good news for all crafters one of our sponsors Wendy at Secret crafter is now doing free p&p on all orders in the UK so if you want to get your hands on some of the new PM’s or any other crafty bits go check out the website :)******************
Debbi has done another one of her fabulous tutorials, the image will feature on her challenge card on Tuesday, it will be another any colour week so don’t forget it don’t matter how many PM’s you have as long as you use one :)Image Tutorial Debbi
I am so excited to be able to use the brand new promarker colours for my image tutorial this week. They arrived on Thursday morning, giving me just enough time to use them for Tuesday's challenge. You'll have to wait until Tuesday to see the image made up into a card, and I hope you like what I've done.
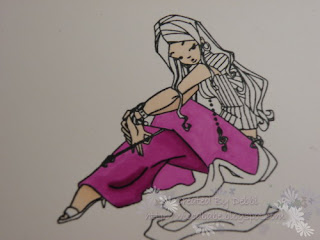
 First I stamped the image, Claudia the Artist from Sugar Nellie with Memento Tuxedo Black onto Stampin' Up whisper white cardstock
 I used on of the new colours Tan for areas of the skin that would be in shadow eg the right arm and just below the hem of her trousers and blended with the Blush
 I then coloured her trousers with another of the new colours, Mulberry, using a small circular motion
 I then added Plum to the areas of her trousers that would be in shadow and blended with the Mulberry.
 Moving onto her belt/scarf, I used Pink Carnation to colour the whole area. I then used Fuchsia Pink for the shadows and blended again with the Pink Carnation (2 pics below)
 Moving onto her hair I used yet another of the new colours, Caramel. I coloured the areas that I wanted highlighted, where I imagined the light would hit.
 I blended this very lightly with the Caramel, I left the effect quite rough, to make it look like it has more texture.
 The I added Umber to the areas that wouldn't get any of the light e.g. the underneath of the hair on her right, the roots and ends.
 For her accessories, bracelets, earrings etc I used Cerise. Then added Magenta from the old colours for the areas in shadow (pic below)
Finally, this is the finished image, you will see how I've made it into a card on Tuesday morning for my challenge week where you can use any colour of promarker.

Debbi xx
******************
Well that is it for this week, don’t forget the fun starts this coming Sunday at 10am, we will see you then :)
Hugs Gina, Denise and the DT xxx


Brilliant tutorial, I really do love reading through these and have picked up some great tips. Thanks ladies.
ReplyDeleteKim xXx
What a lovely image and it looks so beautiful in those colours.
ReplyDeleteThis is another great tutorial that I'll try very hard to put into practise!
Siân x
fabulous colouring tutorial! and some of those new colours are going straight on my shopping list!
ReplyDeletehugs, annie x
Another fantastic tutorial, thanks girls :)
ReplyDeleteExcellent tutorial, thanks Debbi! It's great to see the image come to life like that.x :)
ReplyDeleteHi
ReplyDeleteI am really new to promarkers and was reccomended to use this site for help, I think your colouring is great but have one question. When you say "blended" does that mean with the promarker blender pen? I have just ordered one but don't really know what I should do with it, also is there somewhere on this blog for straight forward beginners advice?
Many Thanks
Wendy
x
I just found this. HAve bought 2 small sets so far but got scared of them lol maybe if I practice I'll get more confidence
ReplyDeleteoxo Ildiko